
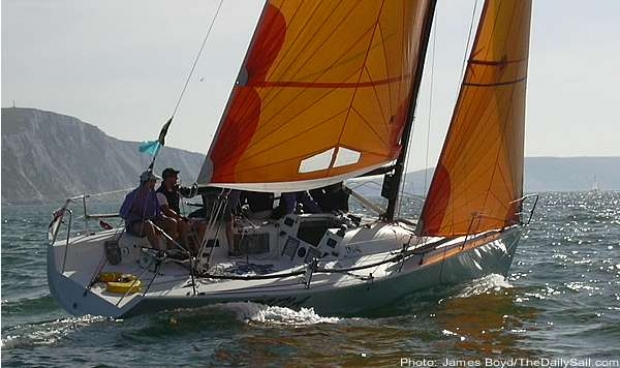
Round the Island - Pace Notes part 2
Wednesday June 23rd 2004, Author: Pete Selby, Location: United Kingdom
In the second part of this guide, Pete Selby provides expert help for those competing in this years Round the Island Race on Saturday, 26 June, taking you from St Catherine's to the Finish.
See part one here.
As always, the responsibility of navigating your boat remains with the crew on-board. These notes are a guide only and should be treated as such.
St Catherine’s point to Bembridge
This leg breaks down into two sections: The first is St Cats to Bonchurch the second Bonchurch to Bembridge.
The faster and earlier boats will be fighting the tide for this section and the brave (or foolhardy) can again gain. Staying closer to shore will get you out of the worst of the tide but put you closer to rocks and ledges. This can be a very fraught time, especially if you are gybing in and out. The shoreline is very steep here so you can get in pretty close, the problem is that there are a lot of rocks that come out of nowhere.
The charts show most of the really big stuff, but miss out on some smaller rocks, especially if you have a deep draft. If I end up close to this shore I make sure that someone on the foredeck is solely looking out for submerged items. I also make sure that I constantly have a good view of our course, even if it means that I end up to leeward. Again, if conditions are rough I will be giving this shoreline a bit more sea room.
As you get to the end of this section, you will come to Bonchurch. This is where the Island rolls northwards into Sandown bay. The temptation to come on to a direct heading for Bembridge Ledge is huge. Be very careful not to change course too soon, as Church rocks and Monks Bay will make a mess of any boat. The advantage of turning to a more northerly course is to get out of the tide.
The tide will be west going until about 1100, but in Sandown Bay the tide is slack for about an hour before this and running at a slower rate before that.
The danger with sailing too far inside the bay is that you can get blanketed by the high ground of Shanklin Down. A good compromise is to hide behind Shanklin spit while you can and cut out for Bembridge from there. This spit, whilst not dangerous, shows up as a rougher patch of water and is normally easy to spot.
From here to Bembridge is fairly easy. Watch that the tide doesn’t push you off course, but basically straight line it in anything except very light conditions. Depth is not really an issue down here unless you end up to the North of the layline in which case a little more caution should be observed.
Bembridge to the Finish
As you get to Bembridge you need to pay close attention to the tide. This is the area where the Channel tide and Solent tide meet, often going in very different directions.
Not until 1600 does the tide in the Eastern Solent begin to flow to the West, so anyone rounding Bembridge before then will be fighting the tide most of the way home.
The tide goes in a bit of a circle here, going SE off shore and NW inshore between Bembridge Ledge and No Mans Land Fort.

The advantage is therefore to head back towards the Island and look for the favourable tide. The problem as ever is water, or rather a lack of it. The sea bed is gently sloping in this area so good use can be made of the echo sounder. The other problem is that this takes you off the rhumb line and adds distance to the leg, so generally a compromise is the best answer. This can of course be greatly altered by having other boats around, so be prepared to change your plan dependant on traffic.
The first big obstacle and gain point is No Mans Land Fort. This is a real chokepoint for the earlier boats, as this is where they hit the full foul stream from the Solent. The best route is to head to the west of the Fort and seek protection from the tide, coming out to the fort at the last minute.
If you decide to do this, keep a good eye on the echo sounder at all times. If you decide to shoot the fort and pass as closely as possible remember that the fort sits on a pile of rock and concrete that spreads out from the sides effecting depth accordingly.
Shooting the fort can really pay or kill you dead. There is always a big wind shadow around the fort, and if you arrive in a group, generally only one of you will gain and the rest will lose. It is well worth considering standing off the fort to maintain better wind but endure the stronger tide. If there is a big parkup going on then standing off can really pay. The slower and later boats should arrive here with fair tide and so should worry only about the wind shadow.
From the Fort the next stop is the finish, so can you still gain? There are a couple of potential areas for gain on this final section.
The first is to stay close to the Ryde sands if you are fighting the tide. Make sure to stay outside of the line that joins the Fort, the post and SW Mining Grounds. There is little room for error here so close attention is really important.
For the later boats with fair tide the important thing is to stay in the maximum tide whilst making the best route for Cowes.
There is however the option to hit the mainland shore, and if this is the chosen option it will greatly affect your route through the Forts. This option does not normally pay, but in vary light conditions the wind can fill in first on the mainland shore and you can sail around all the boats becalmed under the Island and approach the finish from the shelter of the Brambles. This is a big decision not to be taken lightly but the rewards can be overwhelming.
Assuming you stay on the Island side, boats fighting the tide can gain by being in the shallowest water. There are no really nasty surprises on this shore, so watch the echo sounder and remember to look ahead to make sure that you are not sailing into a depth trap. Boats with fair tide should stay in the main channel and to the South of Ryde Middle bank for the best help.
The last major obstacle can be Old Castle point. The wind, if from the West can do two things here. There can be a much lighter area of wind nearer the shore and the wind can bend around the point giving a big gain to those on the inside. The important thing here is to balance the lighter winds against the bend gain, all the time considering the tide. I would suggest that pushing hard for the shore here is generally the wrong thing to do and standing off for better wind will generally pay. If you are close to the shore, watch the depth as there are still a few rocks and shallows that could ruin your day at this point.
So, final corner turned and on to the finish, but which finish! Make sure that you know where YOUR finish is and go there.
Remember that all course records go from The RYS start line to the RYS finish line, so if you think you have a record, make sure to go through your finish line and then on to the RYS.
This is a big race which can give you a great reward, but it is only a race, so remember that personal and boat safety are the paramount aims for the day and sail accordingly!
Enjoy your day I know I will.

Most Read
Most Commented
Comments
Businesses


Pro businesses
-
United Kingdom
-
-
Netherlands
-
France
Editor's choice
Member blogs
-
 Ned Collier Wakefield: MOD70 round BarbadosWell that was intense. 12 hard fought for seconds for the win. In idyllic conditions, Tony Lawsons MOD ...
 -
 Mini Transat leg 2 reportThe second leg of the Mini Transat started on 31st October, just over a month after ...
 -
Leg 1 reportI’ve been working towards the Mini Transat now for three years. In 2013 I was part ...
Business blogs
-
 The Island Sailing Club in Cowes, Isle of Wight, is delighted that Prince Michael of Kent ...
 -
Peta Stuart-Hunt chats with the 25 year-old British solo sailor Lizzy Foreman before she sets sail ...
-
The 2015 Student Yachting World Cup (SYWoC), an ISAF-recognised event hosted and run by students for ...
Editor's Choice
All time favourites...
-
 Three legs down into Ian Walker’s
 -
 Winning all but two races at
 -
 For the first time in its
Latest Comments
Add a comment - Members log in